> ## Documentation Index
> Fetch the complete documentation index at: https://docs.xpertai.cn/llms.txt
> Use this file to discover all available pages before exploring further.
# 💬 ChatKit SDK
使用 ChatKit 构建并自定义可嵌入的聊天。
ChatKit 是构建智能代理型聊天体验的最佳方式。无论你是在打造内部知识库助手、HR 入职助手、研究伴侣、购物或日程安排助手、故障排查机器人、财务规划顾问,还是客户支持代理,ChatKit 都提供可自定义的聊天嵌入来处理所有用户体验细节。
使用 ChatKit 的可嵌入 UI 小组件、可定制提示、工具调用支持、文件附件以及链路推理可视化功能,你无需重新发明聊天界面即可构建智能代理。
ChatKit 还内置了计划模式、运行时技能和插件、Prompt Workflows、Pet 等产品交互能力,方便团队在不重写 composer 的前提下暴露更丰富的 assistant 行为。
## 概述
将 ChatKit 嵌入你的前端,自定义外观与体验,并让用户通过 XpertAI Agent Builder 托管和扩展后端。
如果你当前的重点是接入 XpertAI 后端能力,而不是先处理前端 UI,请先阅读 [接入 XpertAI API](./integrate-xpertai-api)。该文档包含:
* 通过 `@xpert-ai/xpert-sdk` 在 Node.js / TypeScript 服务端接入
* 通过 HTTP API 直接调用 `assistants`、`threads`、`runs` 等公开端点
* 在需要嵌入 ChatKit UI 时,如何通过 `POST /api/ai/v1/chatkit/sessions` 换取 `client_secret`
## 开始使用 ChatKit
如果你要把 ChatKit 嵌入到自己的产品中,推荐按下面的顺序进行:
1. 明确目标 assistant,并完成服务端 API 接入
2. 在自己的后端换取短期 `client_secret`
3. 在前端挂载 ChatKit,并继续做主题、小部件和工具定制
## 将 ChatKit 嵌入到您的前端
从总体上来说,ChatKit 的设置分为三步:先创建一个托管在 XpertAI 服务器上的智能体工作流,然后配置 ChatKit,并添加前端能力来构建聊天体验。
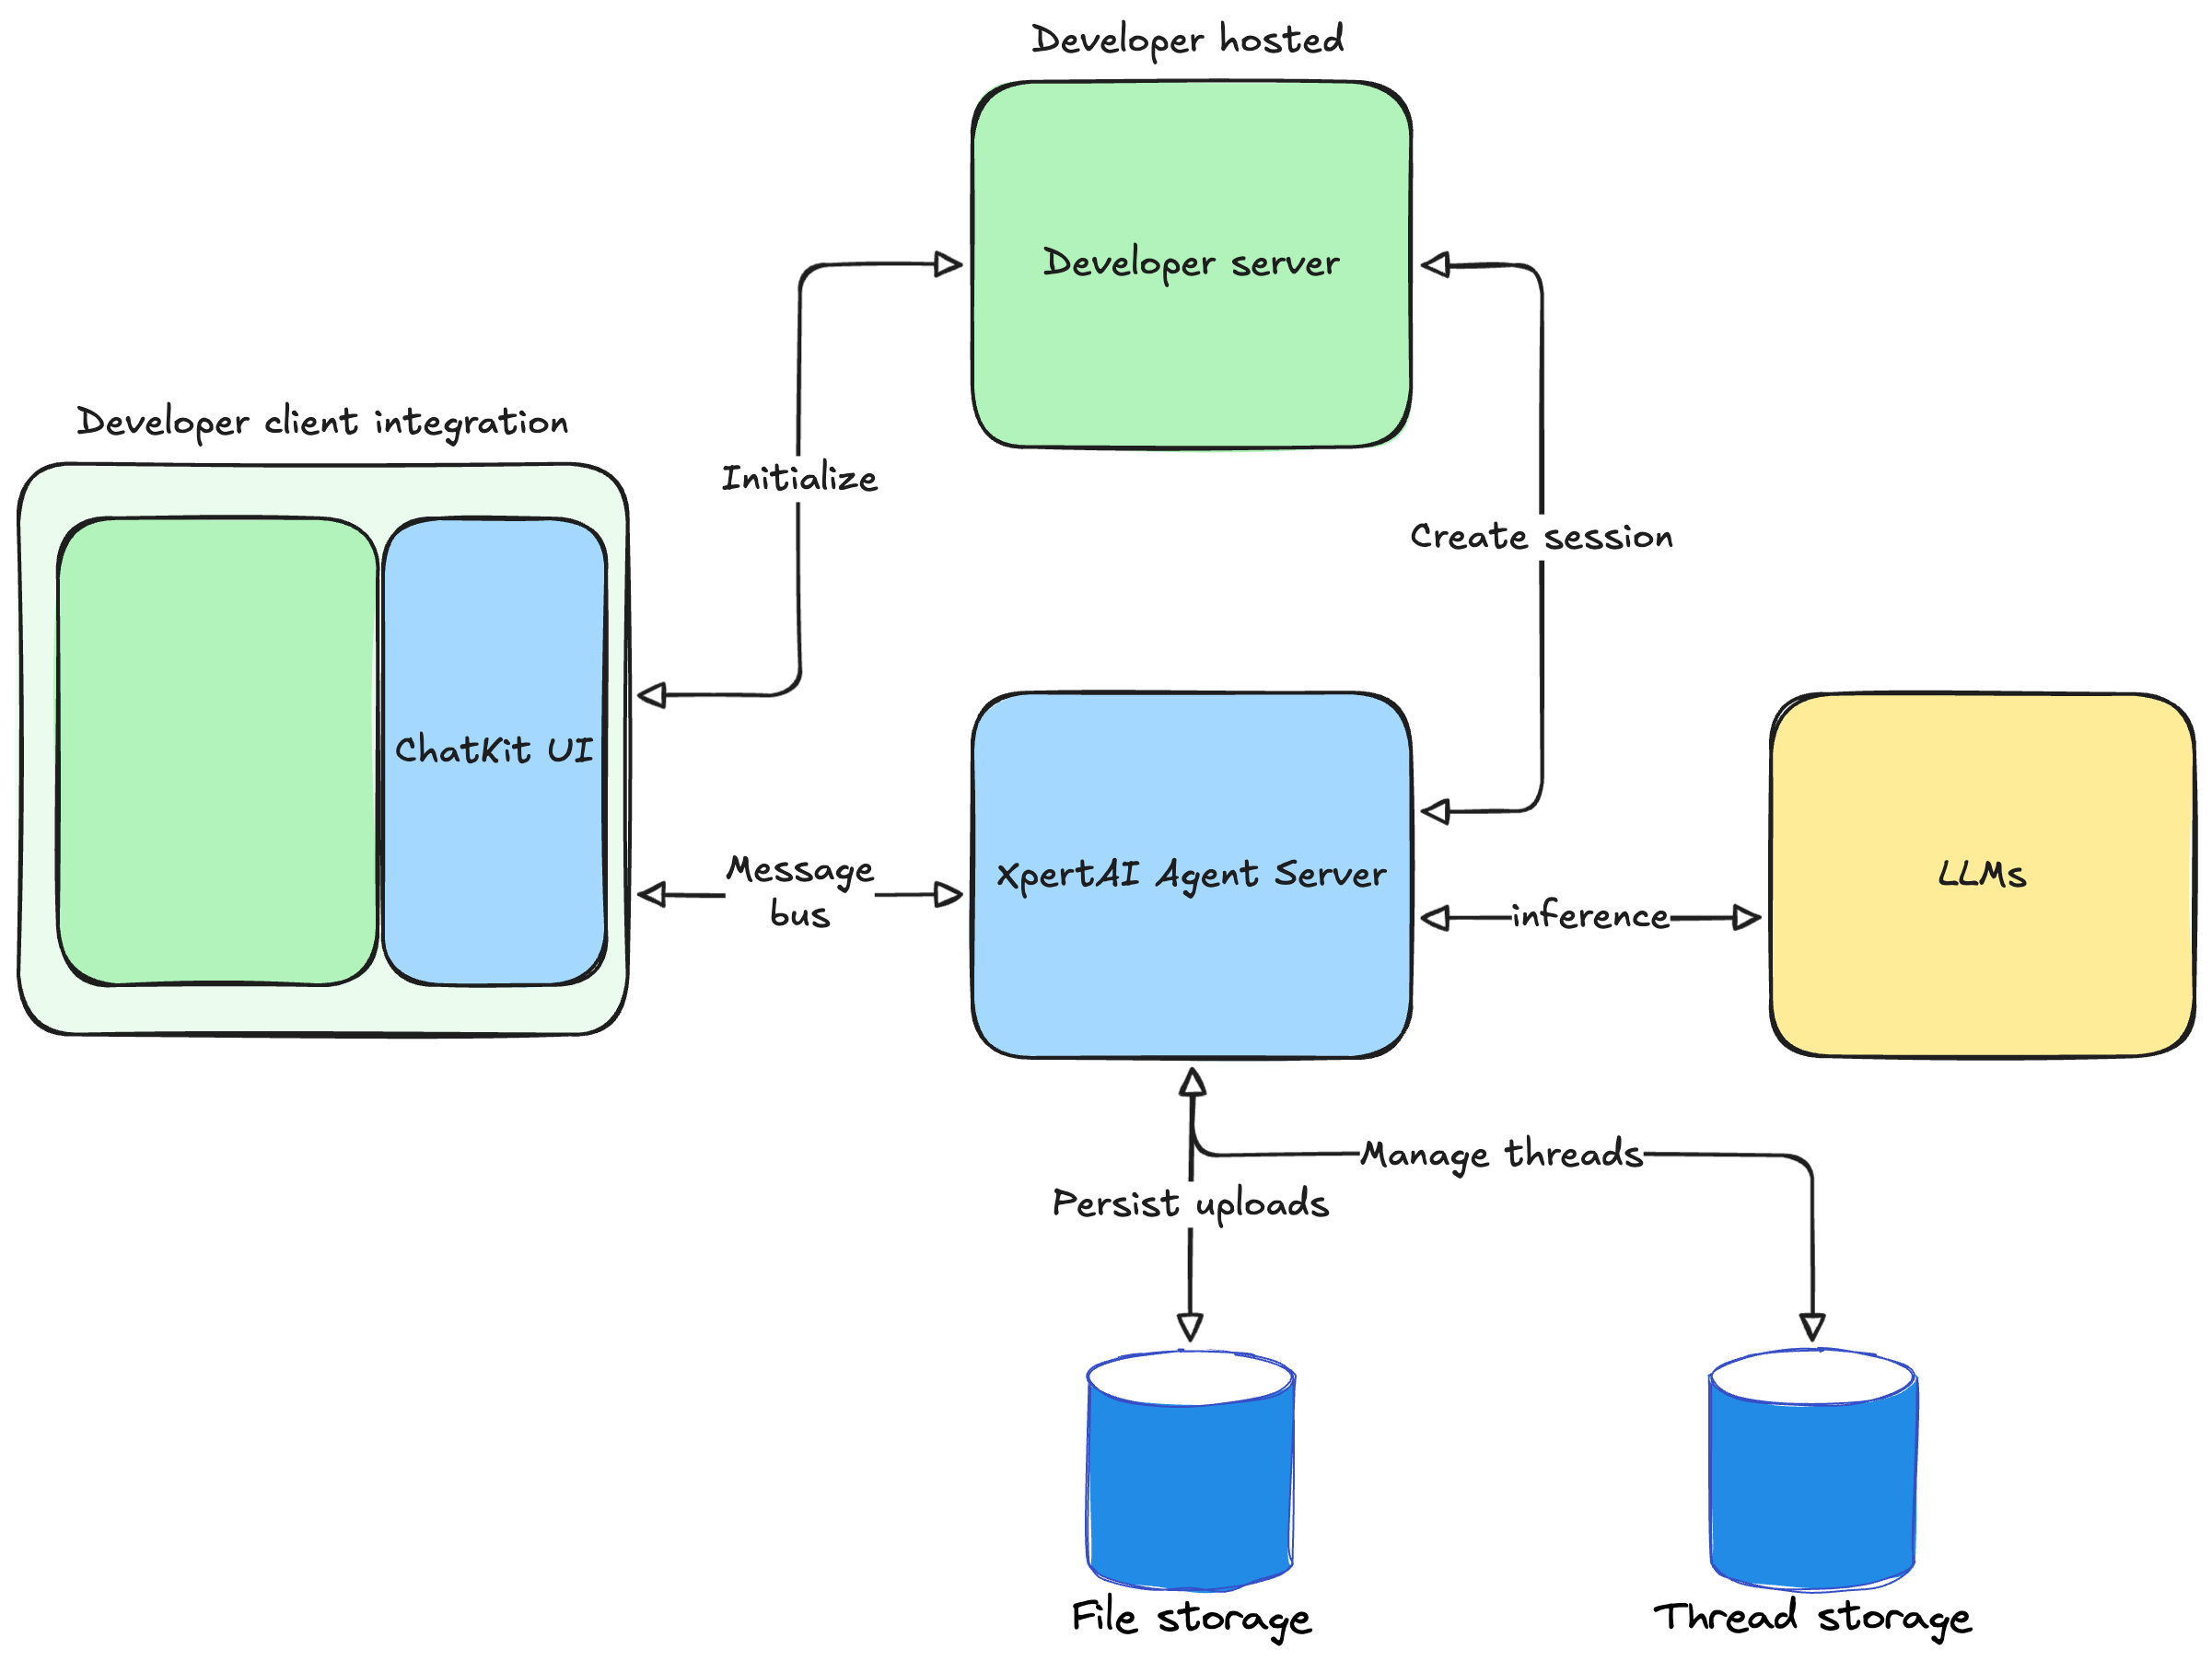 1. 创建智能体工作流程
使用 [数字专家工作室](https://app.xpertai.cn/xpert/w/) 创建智能体工作流程。Agent 工作室是一个用于设计多步骤多智能体工作流程的可视化画布。你将获得一个工作流程的数字专家 ID。
嵌入到你的前端的聊天将指向你创建的数字专家工作流程作为后端。
2. 在您的产品中设置 ChatKit
要设置 ChatKit,你需要让自己的后端负责创建 ChatKit 会话,并把短期 `client_secret` 返回给前端。具体的会话换取流程、请求头和安全约束请阅读 [接入 XpertAI API](./integrate-xpertai-api)。
2.1. 在项目目录中,安装 ChatKit React 绑定:
`npm install @xpert-ai/chatkit-react`
2.2 在您的 UI 中渲染 ChatKit。此代码从你的后端获取 `client_secret`,并挂载一个实时聊天小部件:
```jsx theme={null}
import { ChatKit, useChatKit } from '@xpert-ai/chatkit-react';
export function MyChat() {
const chatkit = useChatKit({
frameUrl: CHATKIT_FRAME_URL || undefined,
api: {
apiUrl: XPERT_API_URL,
xpertId: XPERT_ID,
getClientSecret: async () => {
const baseUrl = API_BASE_URL || '';
const url = `${baseUrl}/api/create-session`;
const response = await fetch(url, {
method: 'POST',
headers: { 'Content-Type': 'application/json' },
credentials: 'include',
body: JSON.stringify({ assistantId: XPERT_ID }),
});
if (!response.ok) {
const errorData = await response.json().catch(() => ({}));
throw new Error(errorData?.error || `HTTP ${response.status}`);
}
const data = await response.json();
if (!data.client_secret) {
throw new Error('Missing client_secret in response');
}
return data.client_secret;
},
},
});
return (
);
}
```
## 构建和迭代
当你已经完成后端接入后,可以继续阅读以下文档来完善 ChatKit 体验:
* [接入 XpertAI API](./integrate-xpertai-api)
* [主题和自定义](./chatkit-themes)
* [小部件](./chatkit-widgets)
* [客户端工具](./chatkit-tool)
* [客户端副作用](./chatkit-effect)
* [动作](./chatkit-actions)
* [Pet](./chatkit-pet)
* [计划模式](./chatkit-plan-mode)
* [技能和插件](./chatkit-runtime-capabilities)
* [Prompt Workflows](./chatkit-prompt-workflows)
* [MCP Apps](./chatkit-mcp-apps)