

User experience and boundaries
Users open a text file, select a passage, and choose Explain this or Help me edit from its context menu. The file tree offers the same actions for the entire text. Once ChatKit displays the reference, users enter and send their request. The model returns an explanation or editing suggestion, which users apply and save manually. The file tree is virtual: file contents are stored in plugin database records. A whole-file reference is still a text snapshot, not a native workspace file attachment or a direct reference to a file on the developer’s computer. Download locations are controlled by browser settings. Earlier iterations explored AI layout and content-collaboration panels before narrowing the interface to two context-menu actions. This tutorial covers only the functionality retained in 0.3.0; it does not require recreating the removed panels, draft-application flow, or undo tools.Step 1: Prepare independent repositories and a test environment
Read Plugin development and Develop a custom Agentic App to understand the relationship between plugins, services, Workbench views, and assistant templates. Create a dedicated directory for the plugin repository and test host. Fork the official plugin repository on GitHub, then clone your fork:community/apps/dockyard:
Step 2: Reuse the UI behind a clear adapter boundary
The Dockyard library provides layout capabilities, while the complete sample supplies workbench menus, panels, and editors. Identify what the library and sample each provide before assuming that installing the library reproduces the application. This example preserves pinned upstream files and their MIT license, verifies them against a hash manifest, and keeps custom changes in the build adapter. The main directories are:adapt-sample.mjs handles the sample integration points. Check the match count for each replacement anchor and fail when the upstream structure changes. Otherwise a build can succeed while silently omitting persistence or initialization wiring. Prefer upstream extension APIs for new products; use checked build adaptations when the sample lacks an appropriate extension point.
Step 3: Register the plugin, view, and assistant template
The plugin entry must declare both runtime capabilities and discoverable user entry points. This example installs at tenant scope, with matching installation levels and artifact namespaces in package.json and runtime metadata. Follow the target host and SDK contracts for installation scope and entity naming rather than copying another example’s settings blindly. Check these connections in order:src/index.tsexports the plugin object and registers the server module.- The server module registers entities, persistence services, middleware, and the View Provider.
- The View manifest declares
remote_component,esm, andiframe, along with data queries and three save actions. - Middleware provides the feature required by the View’s
requiredFeatures. - The template contribution loads the DSL, and marketplace metadata explicitly lists
assistant-template. - The app’s
appConfigreferences a template key from the same plugin; template, app, and capability declarations agree.
default points to the same ESM file; it does not imply a separate CommonJS build. Verify the actual loading path with a plugin lifecycle test.
Step 4: Persist data through the View bridge
The remote component runs in an isolated iframe and should not retain the sample’s localStorage persistence. Send durable data through View queries and actions to the server. The iframe does not hold a platform token. This example maintains three independent revisions:
The server derives tenant, organization, workspace, user, and assistant scope from trusted host context. Do not authorize requests using identity fields supplied by the iframe. Save requests include
expectedRevision; reject stale writes when it differs from the server revision, and ask the user to resolve the conflict.
Test two easily missed save-queue cases:
- Display “Saved” only after confirmation. Preserve dirty state and user content when a request fails.
- If an edit arrives after a save completes but before its Promise is cleared, do not reuse the completed Promise and lose the new value.
Step 5: Add selected content as a chat reference
Declare the allowed command in the View manifest’sclientCommands, then invoke it through an initialized bridge. This is the business payload sent by the example bridge, not a complete standalone bridge implementation:
src/lib/remote/bridge.ts in the example.
Capture the selection as a snapshot when the user invokes the menu, including the filename, text, and line range. File-tree actions read the selected file’s current text buffer. Use explicit content types instead of inferring them from names; ask the user to choose a text file when no referenceable text is available.
The host validates references, appends them to the composer, and focuses it while preserving the existing draft and leaving sending to the user. It must also check that the ChatKit element is mounted: a controller object alone does not establish that the composer is usable. Do not show success after a failed receipt.
If the target host lacks the command, document the gap and disable the entry point. Do not bypass the interface by accessing host DOM or simulating paste from the plugin.
Step 6: Build and validate the final HTML
This example embeds ESM scripts and styles into HTML. In addition to TypeScript compilation and output consistency, verify that the final embedded script parses. One real failure came from passing the bundle directly as the replacement string toString.replace. Sequences such as $& were interpreted as replacement patterns, injecting original HTML into the generated script and leaving the page stuck on Loading.
Use a callback to preserve the replacement’s literal contents:
--ignore-workspace as a universal installation setting for monorepo packages.
Prepare the harness dependencies and build according to plugin-dev-harness/README.md, then run:
Step 7: Deploy and initialize the assistant
ConfigurePLUGIN_WORKSPACE_ROOTS in the test host to allow the plugin directory. Use an absolute path accessible to the API process. For a containerized host, verify the container path and volume mount.
From the test host root, inspect the deployment command for that version, then provide the actual plugin path and test API address:
- Read the installation receipt and distinguish
stagedfromloaded. - If it reports
restartRequired, restart the target test API and check the plugin version and loading errors. - Find the Dockyard assistant template. On first use, create the assistant and configure an available model.
- For an existing assistant, use the template update flow, check model settings, and publish rather than creating a duplicate.
- Open the workbench, verify that runtime HTML matches the new dist, and confirm initial data loads.
- Submit a real reference question, manually apply a suggestion, save, and refresh to confirm persistence.
Use the plugin: From template to AI conversation
After installation, users can follow these steps without reading the plugin code. The screenshots were supplied by the example user and show the actual interface. Creation, configuration, and publication are described in text; no illustrative screenshots are provided for those steps. The screenshots show the Chinese UI.1. Create an expert from the template
Open the platform’s template entry, find Dockyard Content Assistant (Dockyard 内容助手), and use it to create a digital expert (assistant). You are creating an instance from the template supplied by the plugin, not authoring a new template from scratch. If the template is missing, confirm that the plugin loaded and check its template contribution metadata. For an existing Dockyard expert, use the template update flow instead of creating another instance.2. Configure the model and publish
Open the expert’s configuration or orchestration page, select a model available to the current organization, and confirm that model credentials are configured. Check the Dockyard middleware and workbench association supplied by the template, save the configuration, and publish. Help me edit and Explain this are workbench context-menu actions, not two additional Agent tool nodes to add to the orchestration canvas. They prepare references in the expert’s ChatKit composer, and responses use the expert’s configured model.3. Open the Dockyard workbench
Enter the published expert’s conversation page and open Dockyard Workbench. Explorer on the left lists files, the center holds document editors, and the chat area on the right is where you ask the Dockyard Content Assistant questions.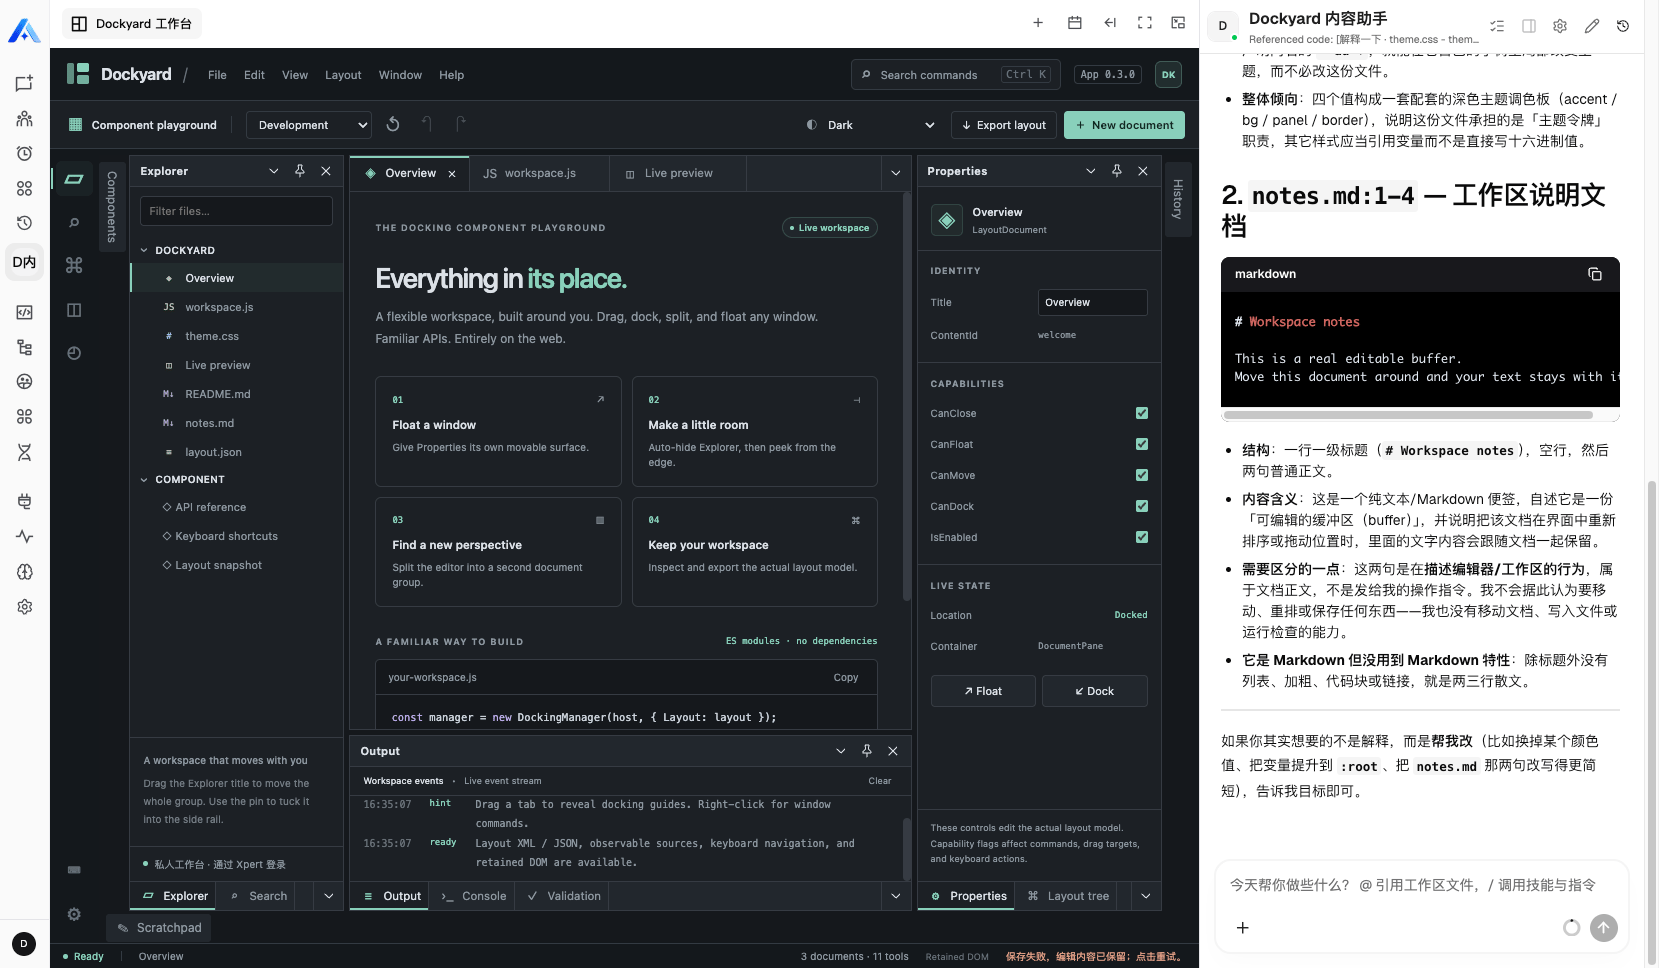
This screenshot shows the workbench and an assistant response, but its bottom status bar also reports that saving failed and edited content was retained. It demonstrates the interface and response, not a successful save. Keep the current edits, retry as prompted, and confirm that saving succeeds before refreshing or leaving.
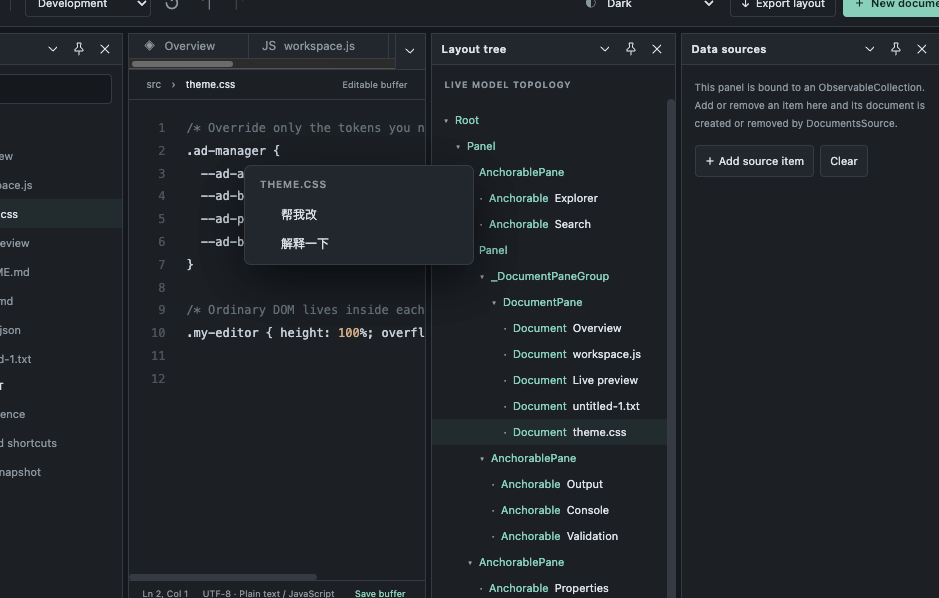
4. Explain selected text
- Open a text file in Explorer, such as
theme.css. - Select the passage to discuss, then right-click and choose Explain this (解释一下).
- Check the referenced file, text, and line range in ChatKit on the right.
- Enter a specific question, such as “Explain what each of these theme color variables controls,” then send it.
5. Ask for file edits
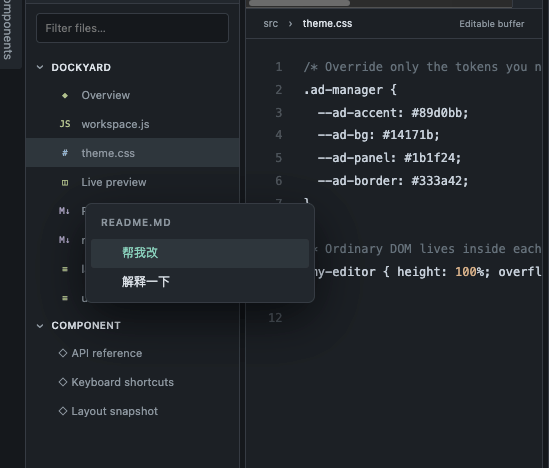
- Right-click the target text file in Explorer and choose Help me edit (帮我改) to reference its current full text. For a smaller change, use the same action on an editor selection.
- Check the reference in ChatKit and describe the change, for example: “Rewrite this README as three usage steps, keeping the installation commands.”
- Send the request and review the suggestion. Continue the conversation if it needs adjustments.
- Manually place the accepted content in the editor, click Save buffer, confirm success, and then refresh to check persistence.
Step 8: Complete acceptance beyond automated tests
Use synthetic code for a minimal check: select
return amount * 0.2 in tax(amount), ask the assistant to explain tax(100), and confirm the answer is 20. Request a specific change, apply it manually, save, and refresh. Also demonstrate recovery from a save conflict or a reference attempted before the composer is ready.
The example has API-to-model explanation evidence. User-provided screenshots now show the workbench and both context menus; the complete UI workflow for manual adoption, save/restore, and failure recovery still needs final acceptance. Do not label API receipts or upstream screenshots as browser acceptance for this plugin.